Made-to-order roof-rack accessory
Starlink Mini Magnetic Mount Landing Plate
A powder-coated steel roof-rack plate that gives magnetic Starlink Mini mounts a secure landing surface — so you can lift the dish off without tools when camp, trees, or terrain block the sky.
Why it exists: bolt-in mounts lose the sky under trees or in camp. Run a magnetic mount on the rack, then lift the dish off and reposition it for clear sky — no tools.
Requires the Veritas magnetic Starlink Mini mount (sold separately).
Real rack install
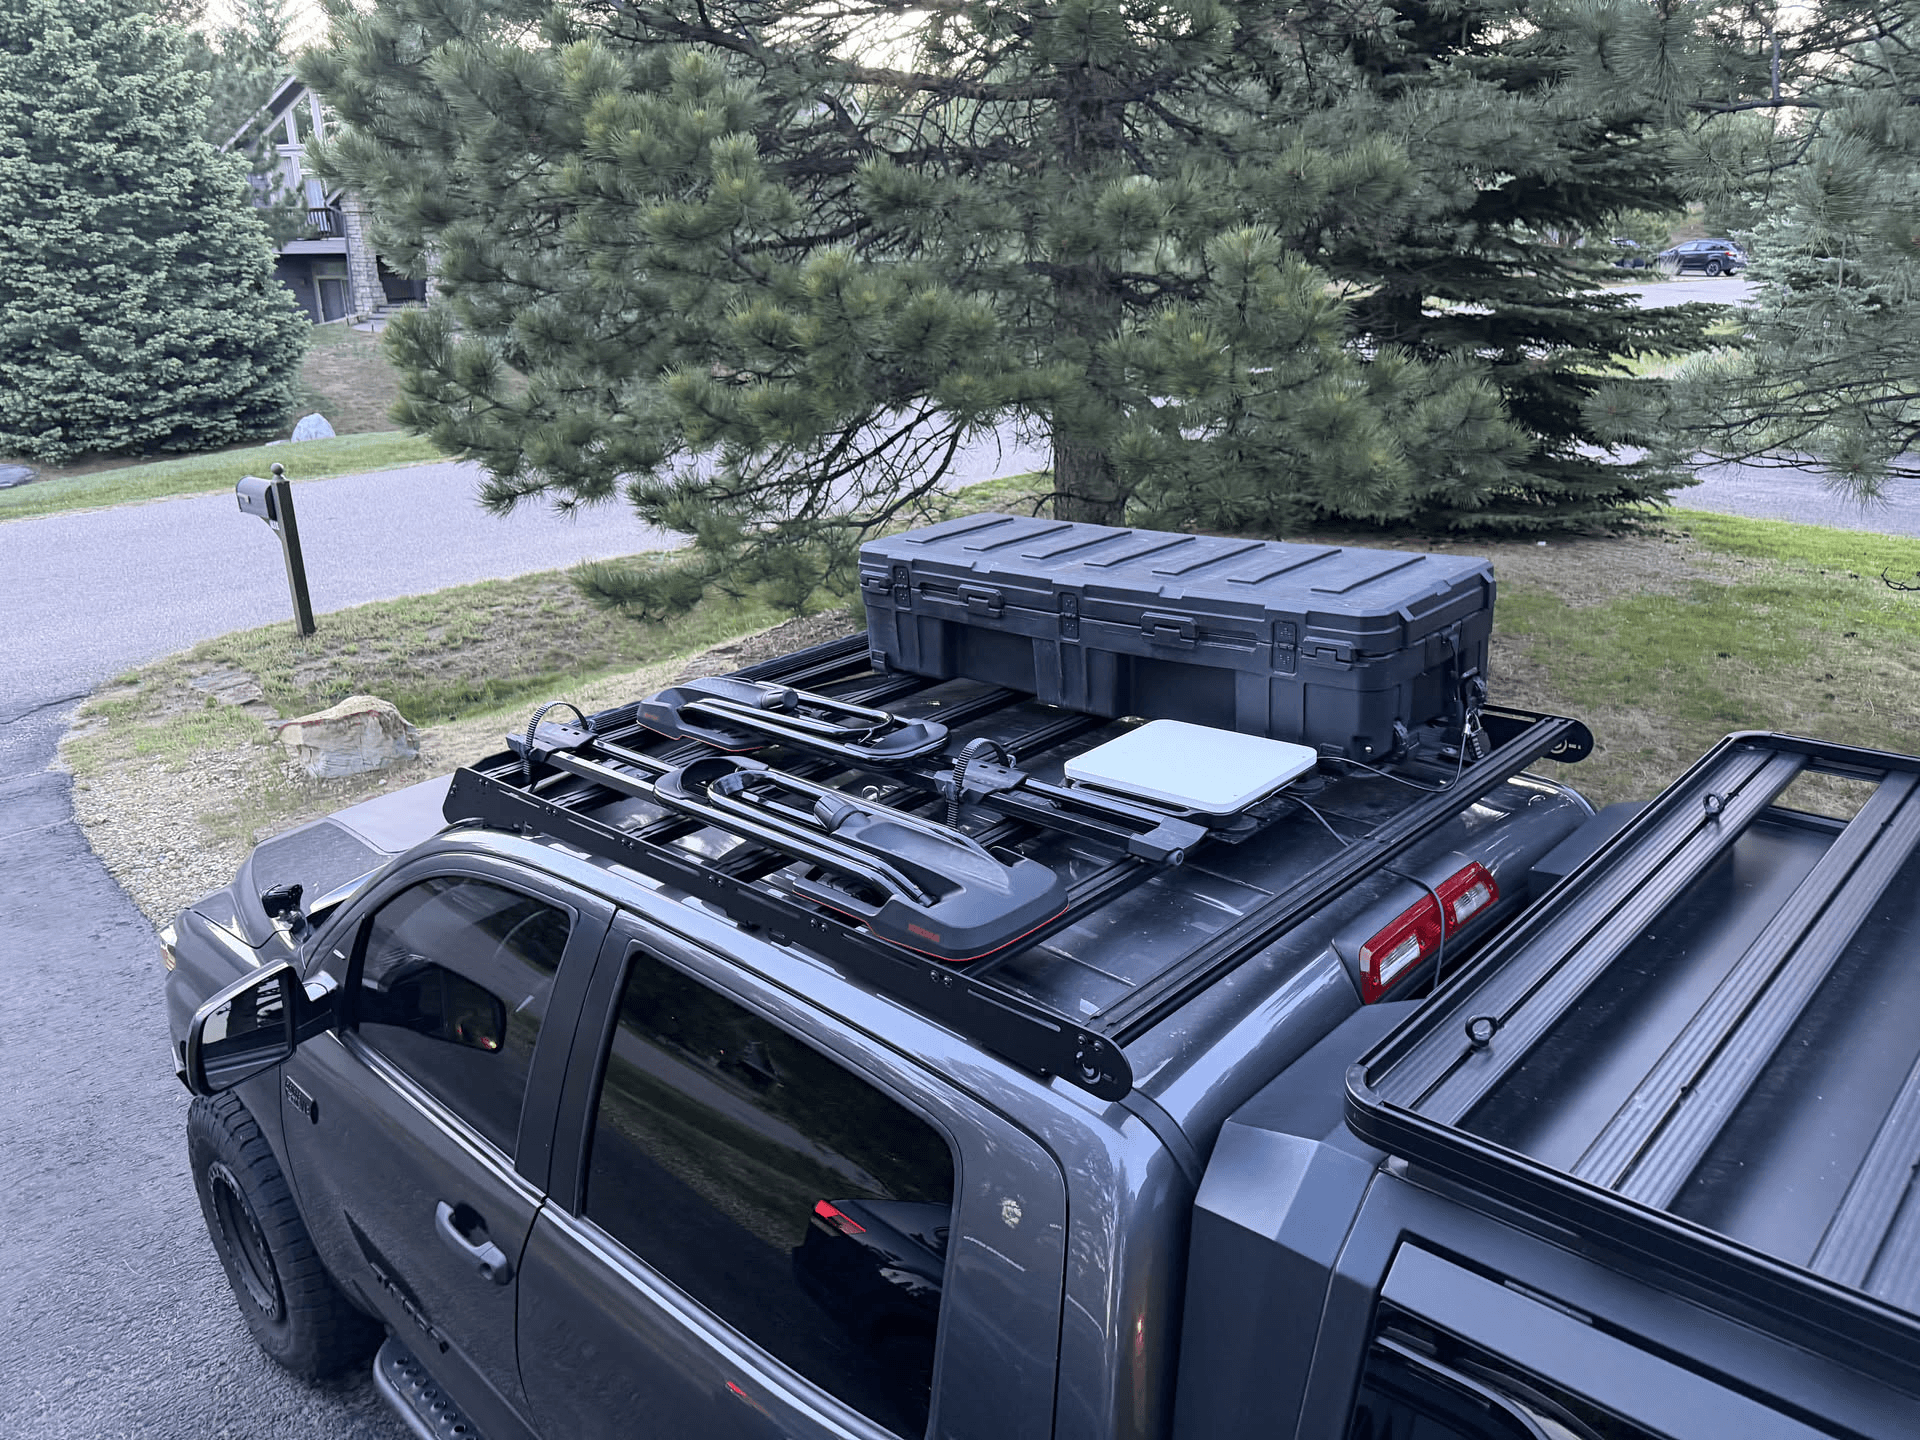
Mounted on a Prinsu-style roof rack with the plate spanning two crossbars.
Built from the actual truck setup
These photos show the plate in place on the rack, with the Starlink Mini on the Veritas magnetic mount and a storage box sharing the platform.
Mounted on a real roof rack
The plate spans the rack crossbars and leaves room for the Starlink Mini and other cargo.
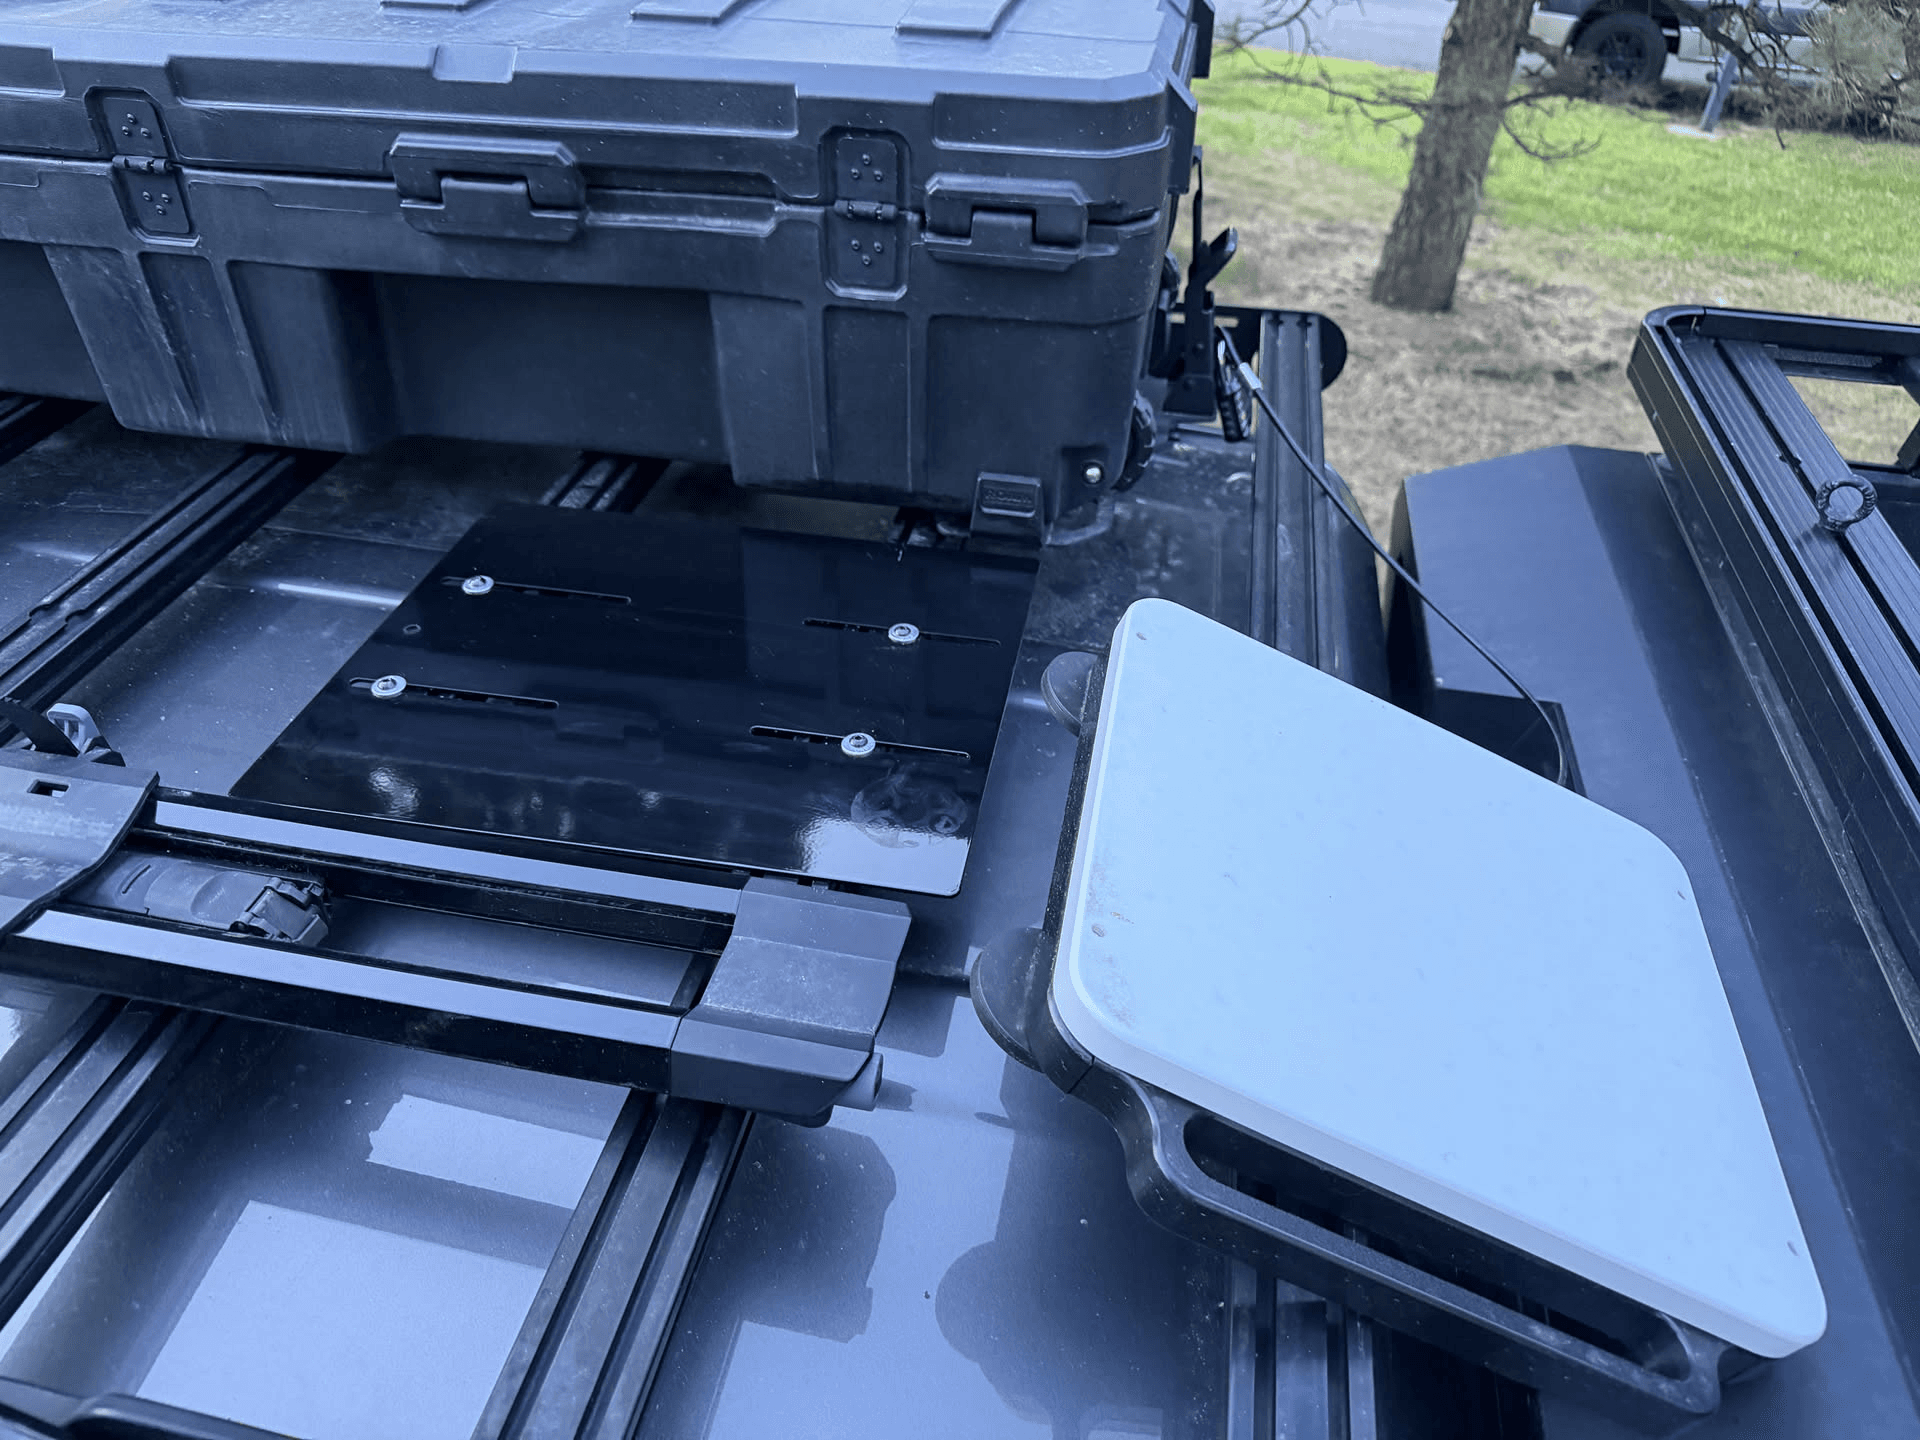
Low-profile hardware layout
Rounded mounting slots and button-head hardware keep the surface clean and rack-friendly.
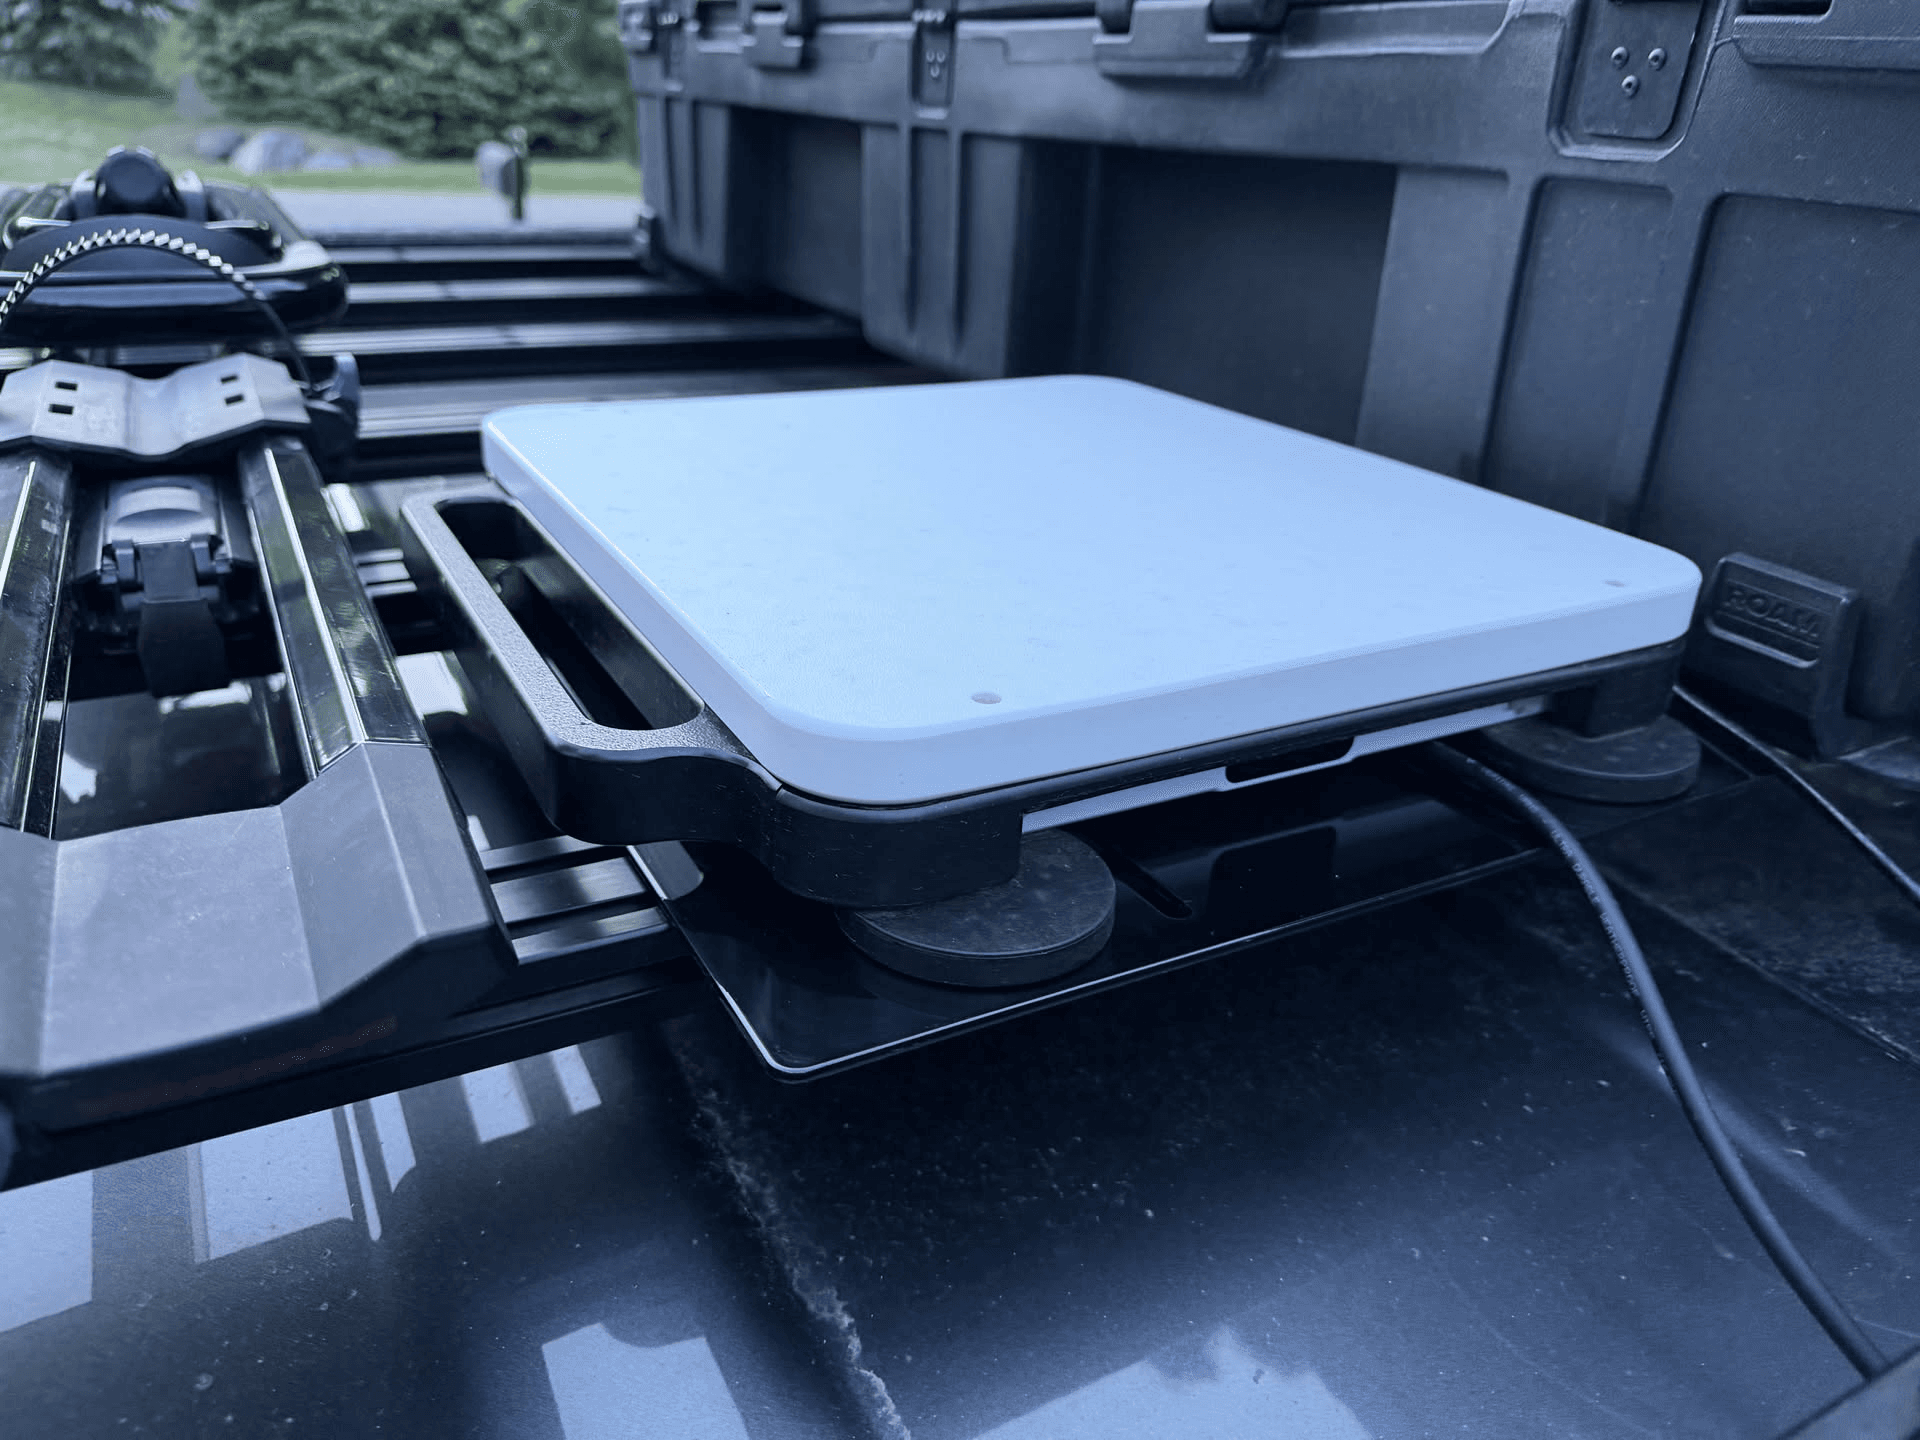
Flat magnetic landing surface
Powder-coated steel gives the Veritas magnetic feet a stable landing zone on the rack.
Product specs
Choose the standard 14 ga plate to keep cost down, or the heavy-duty 11 ga plate if you want the original thicker version. Both include the same mounting hardware kit.
Material
1008 cold rolled mild steel
Finish
Black powder coat
Plate size
13 in × 15.5 in
Thickness options
14 ga standard or 11 ga heavy-duty
Mounting slots
Four 5/16 in rounded slots
Safety hole
5/8 in tether / leash pass-through
Included hardware
4 bolts, 4 washers, 4 T-slot nuts
Choose your plate
Pricing is listed before shipping so the product stays honest for local pickup, nearby buyers, and longer-distance shipments. Shipping is calculated separately at checkout.
Will it fit my rack?
- ✓Fits flat platform/extrusion racks with two crossbars and top-facing 1/4-20-style T-slot hardware.
- ✓Verify crossbar spacing and mount footprint before ordering.
Standard 14 ga kit
Best for most racks
14 ga powder-coated steel
$199
plus shipping
The cost-conscious version for most roof-rack installs. Thin enough to keep the price down, still steel, and supported by the rack once mounted.
- ✓ Powder-coated steel plate
- ✓ Four bolts, washers, and T-slot nuts
- ✓ 5/8 in safety leash pass-through
Heavy-duty 11 ga kit
Best if you want the original thicker plate
11 ga / ~0.120 in powder-coated steel
$229
plus shipping
The original tested thickness. Heavier, stiffer, and more premium in-hand, but more expensive to make one at a time.
- ✓ Powder-coated steel plate
- ✓ Four bolts, washers, and T-slot nuts
- ✓ 5/8 in safety leash pass-through
Before you order
- •Made to order — exact lead time varies. Email to confirm the current ship window before ordering.
- •US shipping only.
- •Shipping is calculated at Stripe checkout.
- •Starlink Mini, Veritas magnetic mount, and safety leash are not included.
- •Use an independent safety leash/tether anchored to a rack hard point.
- •Email Rob with any questions before ordering.
Questions? Email Rob before ordering.
What is included
The goal is to make this a complete mounting kit, not just a loose plate. Buyers still need their Starlink Mini, Veritas magnetic mount, and an independent safety leash.
- ✓Powder-coated steel Starlink Magnet Plate
- ✓Four 1/4-20 x 3/4 in stainless button-head socket cap screws
- ✓Four 1/4 in stainless SAE flat washers
- ✓Four 1/4-20 slide-in T-slot nuts for compatible extrusion racks
- ✓Install and safety tether guidance
Fitment notes
This started as a real roof-rack build part, not a generic Amazon bracket. Rack setups vary, so fitment language needs to be honest.
- ✓Designed for flat vehicle roof racks with two crossbars and top-facing 1/4-20-style T-slot hardware.
- ✓Works best with Prinsu-style, Sherpa-style, extrusion, or platform racks that accept common roll-in T-nuts.
- ✓Sized for the Veritas magnetic Starlink Mini mount footprint with clean magnet landing zones.
- ✓Buyer should verify crossbar spacing, slot hardware, and mount footprint before ordering.
Install overview
Final install instructions should be updated after the next sample is test-fit, but this is the intended hardware flow.
Step 1
Set the plate on two rack crossbars with the long axis running front-to-back.
Step 2
Slide 1/4-20 roll-in T-nuts into the crossbar slots.
Step 3
Fasten with low-profile stainless or zinc button-head bolts and washers.
Step 4
Place the Veritas magnetic mount on the powder-coated steel surface.
Step 5
Run an independent safety leash through the 5/8 in hole and anchor it to a rack hard point.